This lesson started with a mini lecture of what were LEDs, resistors, and how breadboards worked.

(If you are teaching your students about the resistor color code. Follow this link to a great Resistor Color Code Game)
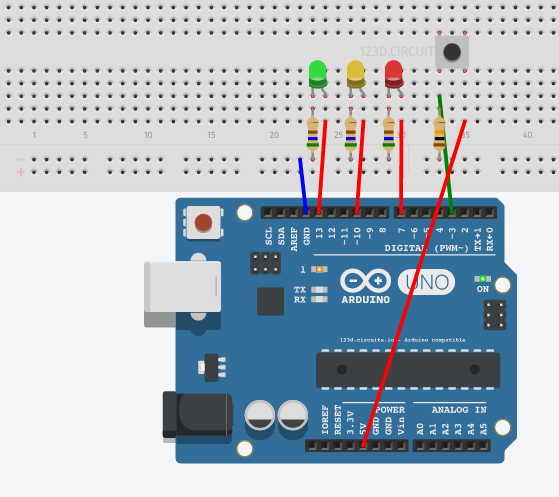
Students then built the traffic light circuit with the arduino below.
Students then wrote and uploaded a sample program. They played with the lines of code in the void loop to turn on and off all three lights.

Students then made the lights simulate a real traffic light. The following was their challenge.
- Make the yellow light flash on and off 5 times. (one second on one second off)
- Then the Green light goes on for 10 seconds.
- Next the Yellow light goes on for 3 seconds.
- Last the Red light is on for 7 seconds.
- The program then loops back to the blinking yellow light.
Last the students worked on modifying a program to simulate a walk button in the traffic light system. They used the following program to modify.

Students added their traffic light program into the else brackets and changed the line of code for if the button was pressed.
Students realized that to make the walk button to work you had to hold it down because of all the delays in their traffic light program. Additionally after you held down the button the traffic light went from red to yellow. Maybe the program should just stay red longer. Some students took out the yellow turning on when the button was pressed.
Keep following. There will be more about using the clock on the board to make a more realistic traffic light.
No comments:
Post a Comment